

Whatever you make, sell, store, fix, ship, or create, the room you do it in shapes how the work flows. A spare bedroom, a packed garage, a corner of someone else’s shop. It worked, until it didn’t.
Then the inventory outgrew the closet. The orders piled up by the door. The tools, the stock, the camera gear, the job materials started living wherever they fit. Now you are standing in a WorkBay unit with room to breathe and one good question to answer.
Not just how to customize warehouse space. How to customize your space so it moves the way you do.
A custom setup does not need to be fancy. It needs to be useful. A clear path from the door. Storage where you can reach it. Light where your hands are. A place for tomorrow’s work so you are not digging through yesterday’s. That is what building your bay is about, and it works the same whether you run a bakery, a brand, a build crew, or a one person shop.
The bay is blank. That is the point.
A blank bay can feel unfinished the first time you walk in. No racks. No bench. No shelves. No system. But that blank space is the advantage.
Most warehouse space gets used the way it came. A rack goes where the last tenant left one. Boxes land in the nearest open corner. Gear gets stacked wherever it fits. Before long the space is full, but the work still does not flow.
A WorkBay unit gives you room to plan your layout before the work takes over. Depending on the location and unit, your bay may include features that help with day to day work, loading, storage, customer visits, or hands on production. You can review the current WorkBay amenities and ask the local team what is available at your nearest park.
The point is not to copy someone else’s layout. The point is to build around your own work. For a baker that might mean prep tables, cold storage, and a clean pickup counter. For a content creator, one clean photo corner and one messy build corner. For a contractor, a workbench, a lumber rack, and a staging zone by the door. The best space starts with one question: what has to happen in here every day?


Start here: what are you actually doing in here?
Before you buy shelves, hang pegboard, or drag in a bench, sort your bay by use. Almost every setup falls into one of four buckets. Find the one that fits, then build from it.
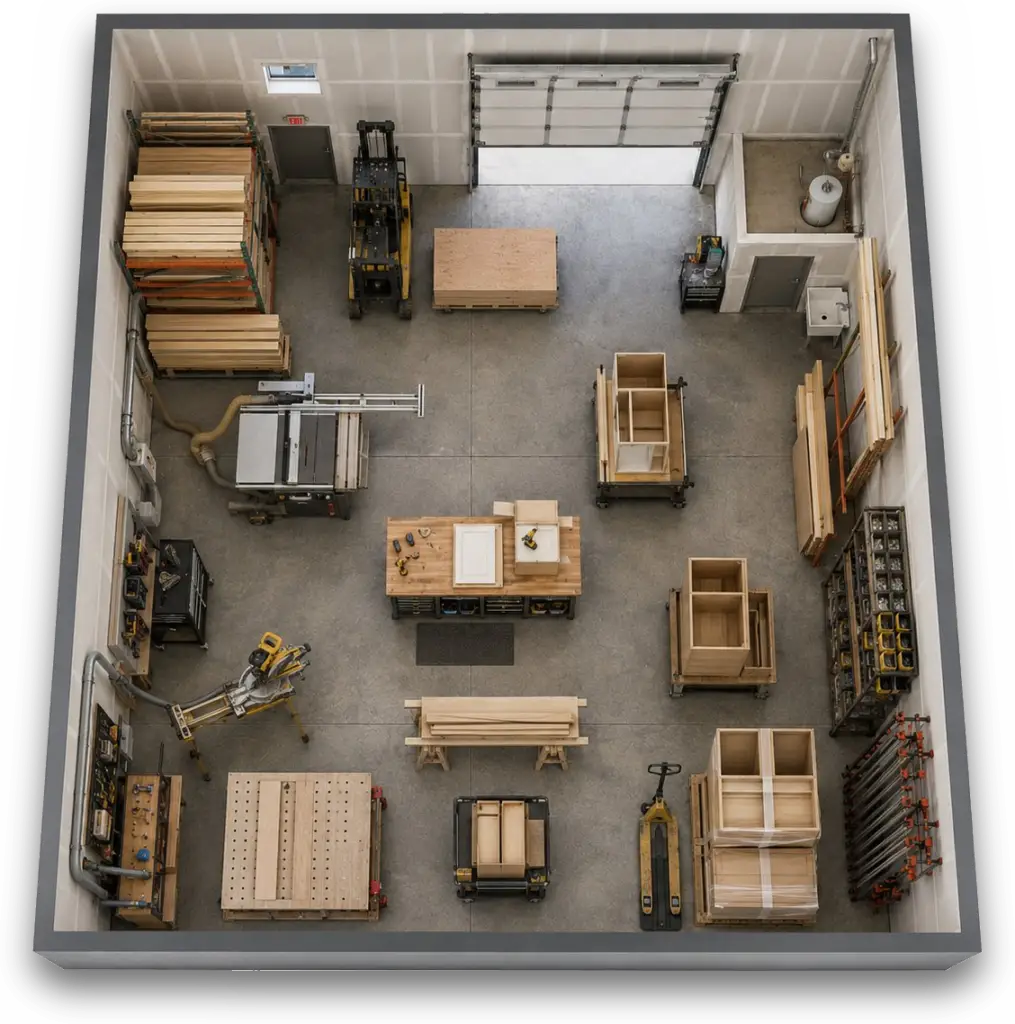
Production, fabrication, or repair
Do you work with tools, materials, or equipment in the space?
Setup priorities: workbench placement, pegboard or shadow board, lumber or material rack, task lighting, outlets near the work, floor protection where needed.
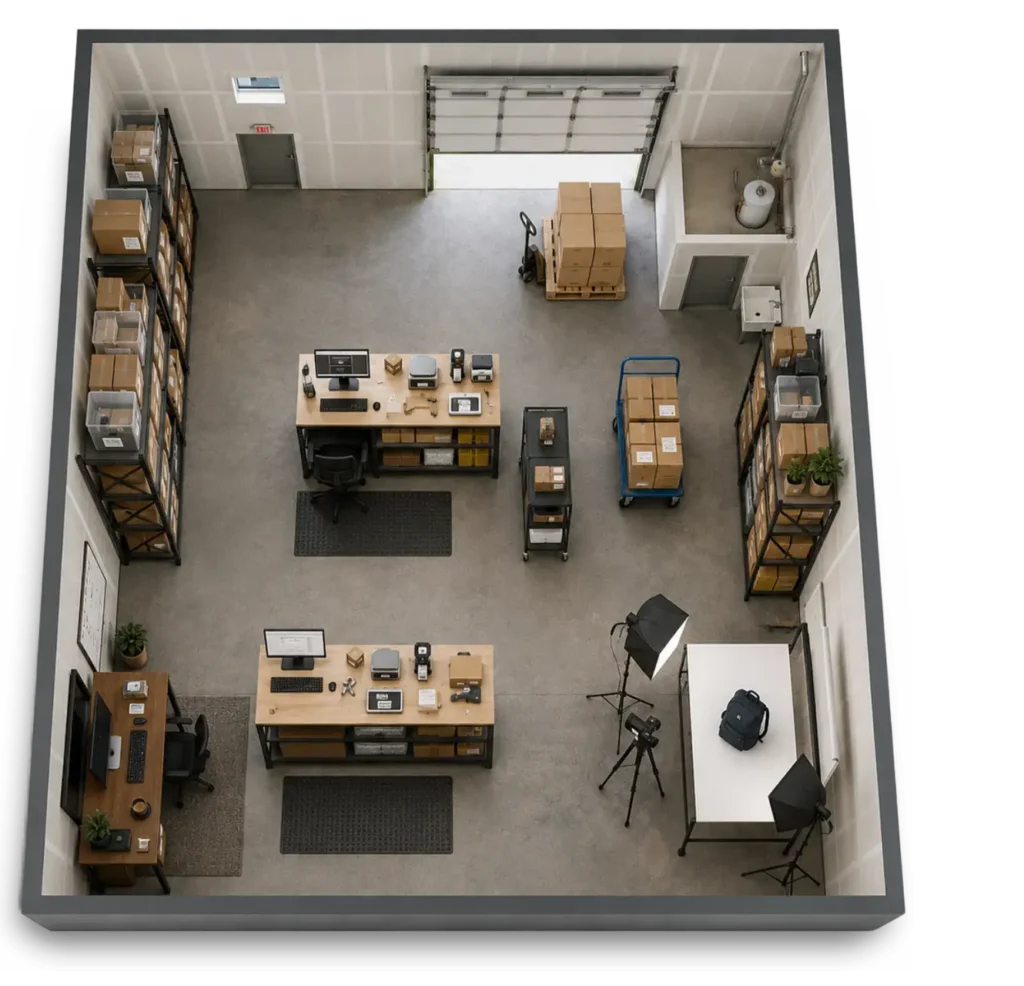
Storage and shipping
Do you mainly store inventory and pack or ship orders?
Setup priorities: shelving or pallet racking, packing station, clear aisles, fast moving inventory near the door, a staging area.
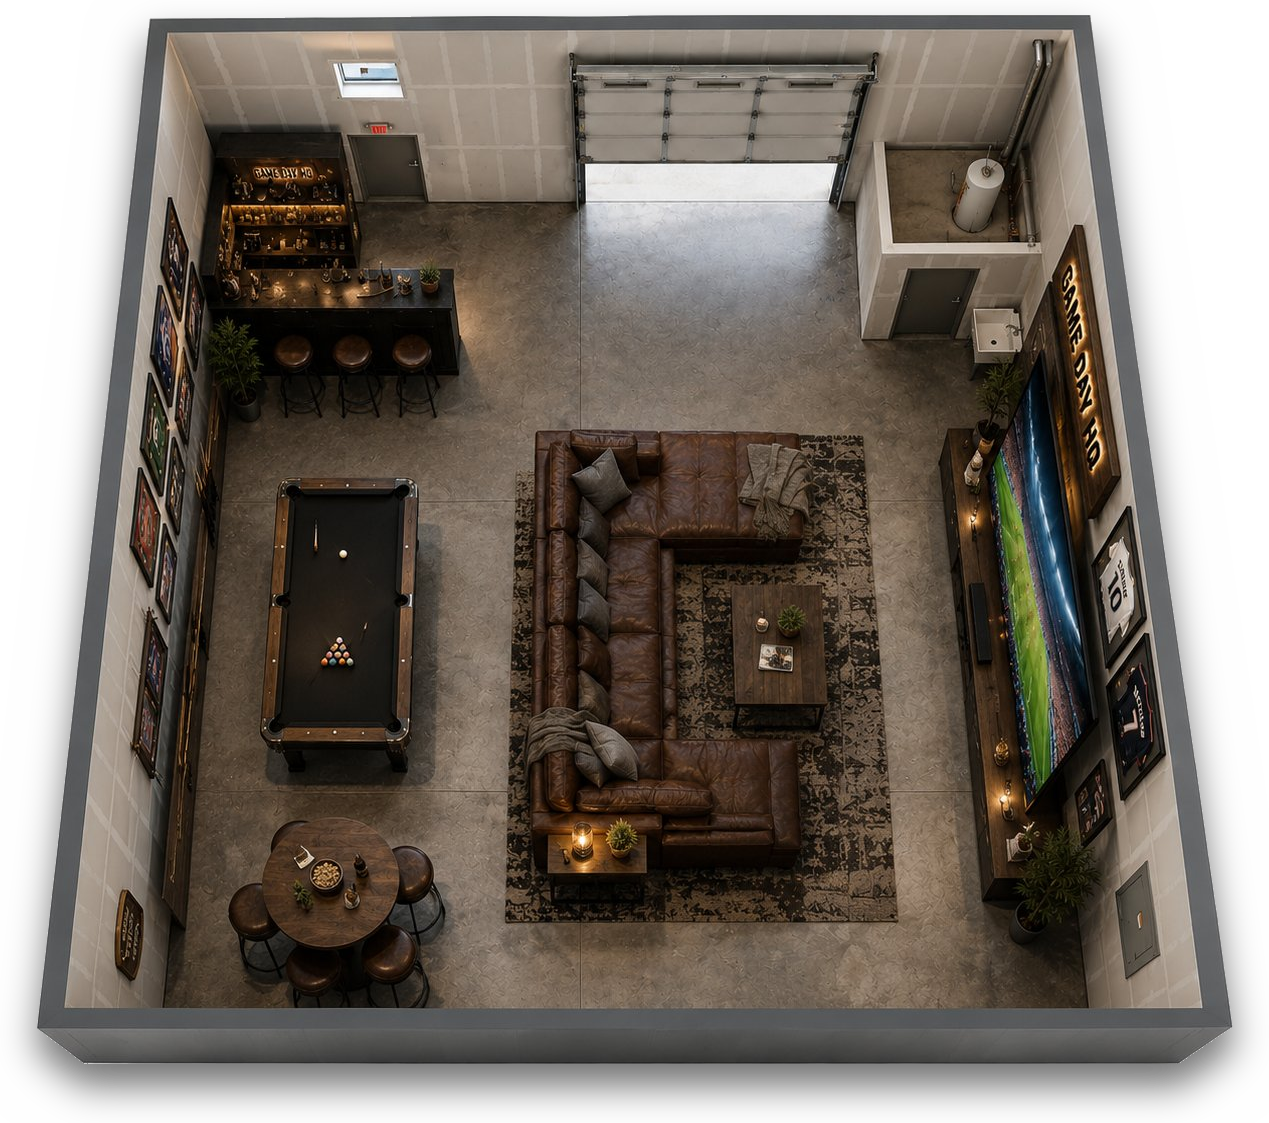
Customer facing or presentation
Do customers, clients, or vendors visit the space?
Setup priorities: clean entry area, better lighting, branded touches, seating if needed, clear separation from the working mess.
Creative, studio, or photography
Do you need controlled light, clean surfaces, or a shoot ready setup?
Setup priorities: lighting placement, clean surfaces, backdrop area, prop or material storage, separation between storage and shooting zones.
Want to see how this works in a real bay? Find a WorkBay location near you and book a tour.
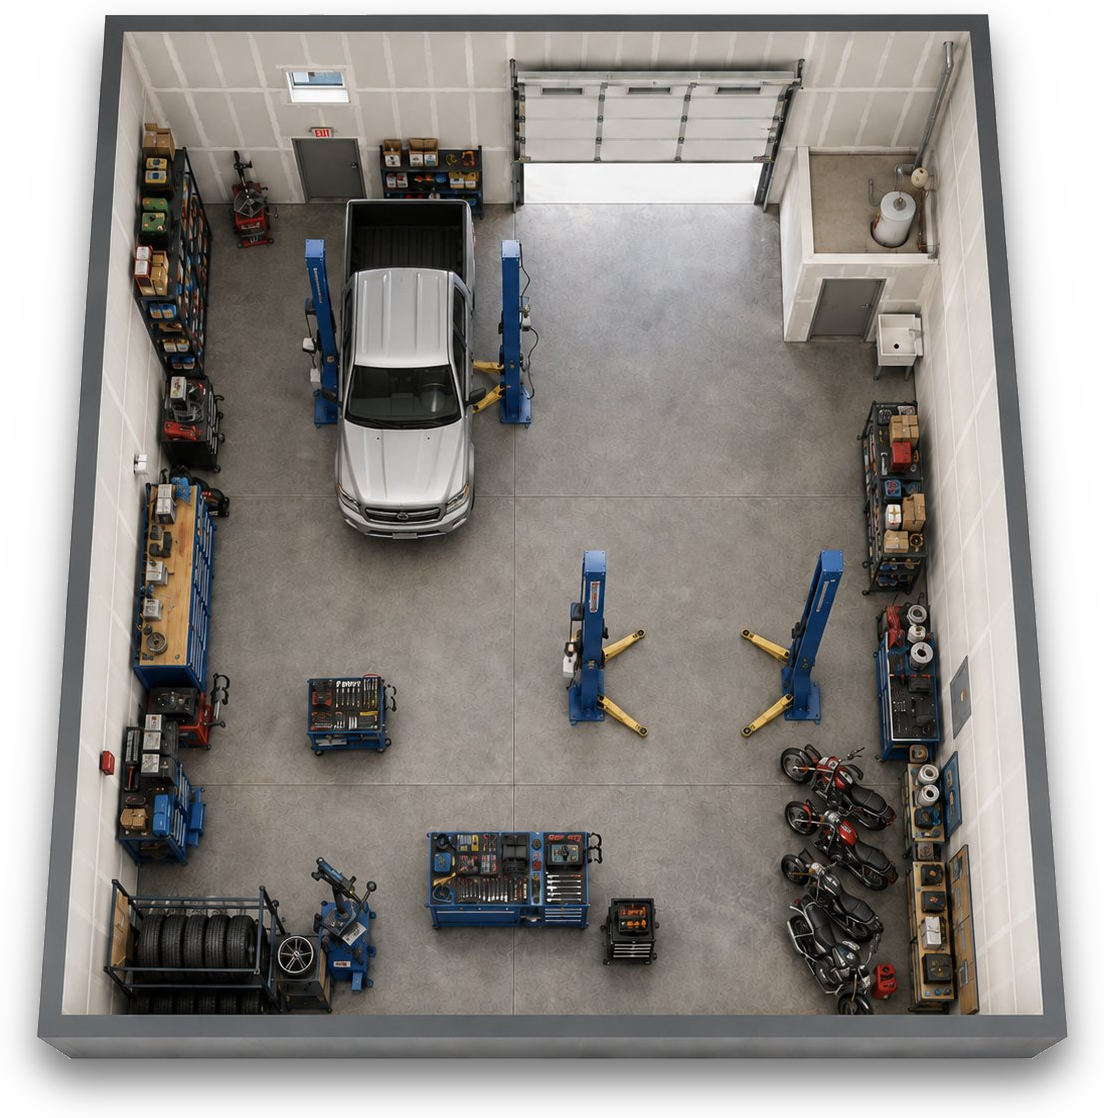
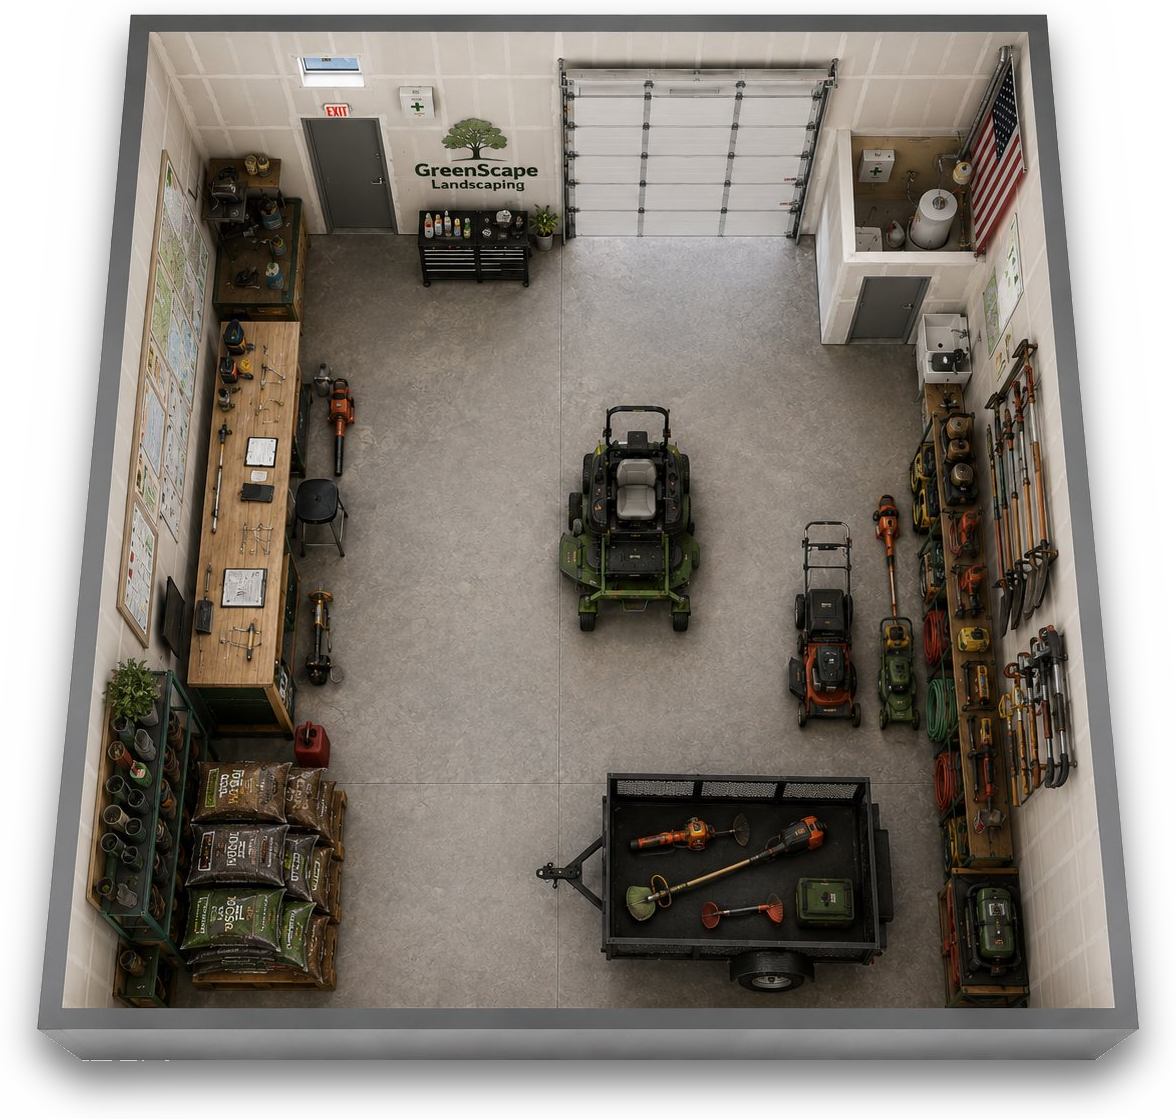
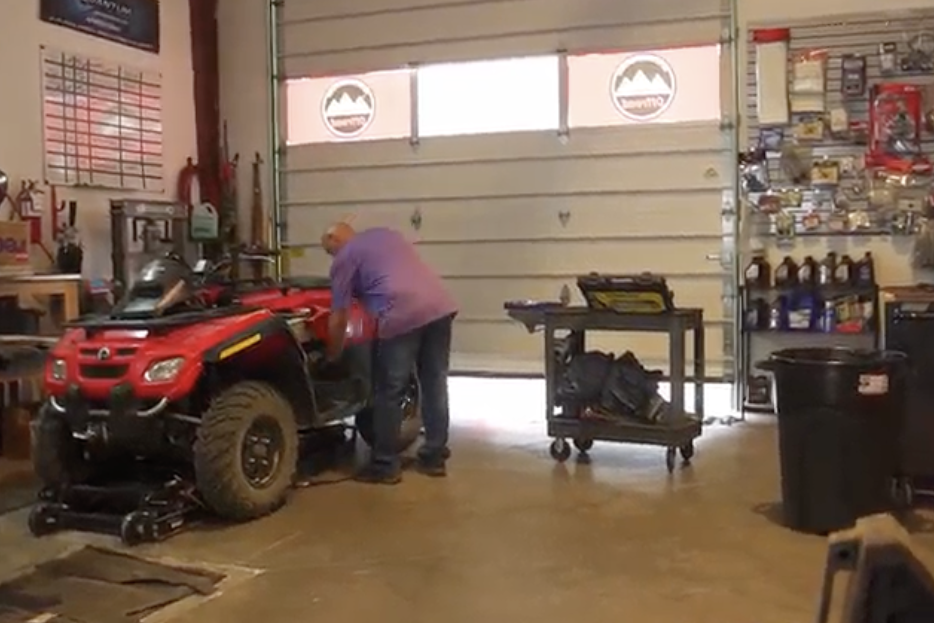
If you work with tools, materials, or equipment
This is the contractor and trades setup. Carpenters, fabricators, repair shops, HVAC contractors, welders, detailers, installers, jewelers, woodworkers, anyone who works with their hands needs the bay to do more than hold stuff.
Start with the workbench.
If floor space matters most, put the bench against a wall. That keeps the middle of the bay open for material, carts, ladders, machines, or a truckload of supplies.
If you need to work around all sides of a piece, a central bench can work better, but only if you still have a clear path from the door.
Once the bench is placed, hang the tools where the work happens. Pegboard, a shadow board, or a wall mounted rail keeps the daily tools visible. You should be able to grab the drill, square, clamps, bits, charger, tape, and pencils without opening three bins.
Then deal with long material. Lumber, pipe, trim, conduit, sheet goods, and metal stock should not live across the floor. Use a side wall rack if the material is long and light enough for that kind of setup. Keep the floor open where you load in and load out.
A good bench setup also needs light. Overhead lighting helps, but the bench needs its own task lighting if you are cutting, wiring, sanding, repairing, or doing detail work. Put light where your hands are, not just where the ceiling allows. Same goes for power. Before you commit to a layout, look at where the outlets are and where your tools will actually run. Do not build the whole bay around extension cords. If you need a different electrical setup, talk with the local WorkBay team about what is possible at that location before assuming anything can change.
For more on choosing space that fits hands on work, read what makes a bay trade ready.
If you store inventory and pack orders
A storage and shipping setup has one job: cut the number of steps between inventory, packing, and the door. This is the ecommerce seller, the distributor, the subscription box, the online shop that finally outgrew the dining table.
Place the packing station first.
It should be close enough to the door that finished orders are easy to stage, but not so close that boxes block the entrance. Keep tape, labels, mailers, packing paper, a scale, and the printer at the table or directly above it.
Then place shelving around how often you touch each item. Fast moving products should be easy to reach. Slow movers can go higher, lower, or farther back. Heavy boxes stay low. Small parts need labeled bins. Anything that gets confused often needs a bigger label than you think.
Leave a real aisle. Not the kind that works when the bay is empty. The kind that still works when three orders are half packed and a delivery just came in. A good fulfillment setup usually runs three zones: inventory on shelves, packing at the table, and staging near the door for outgoing orders, incoming supplies, or tomorrow’s pickup.
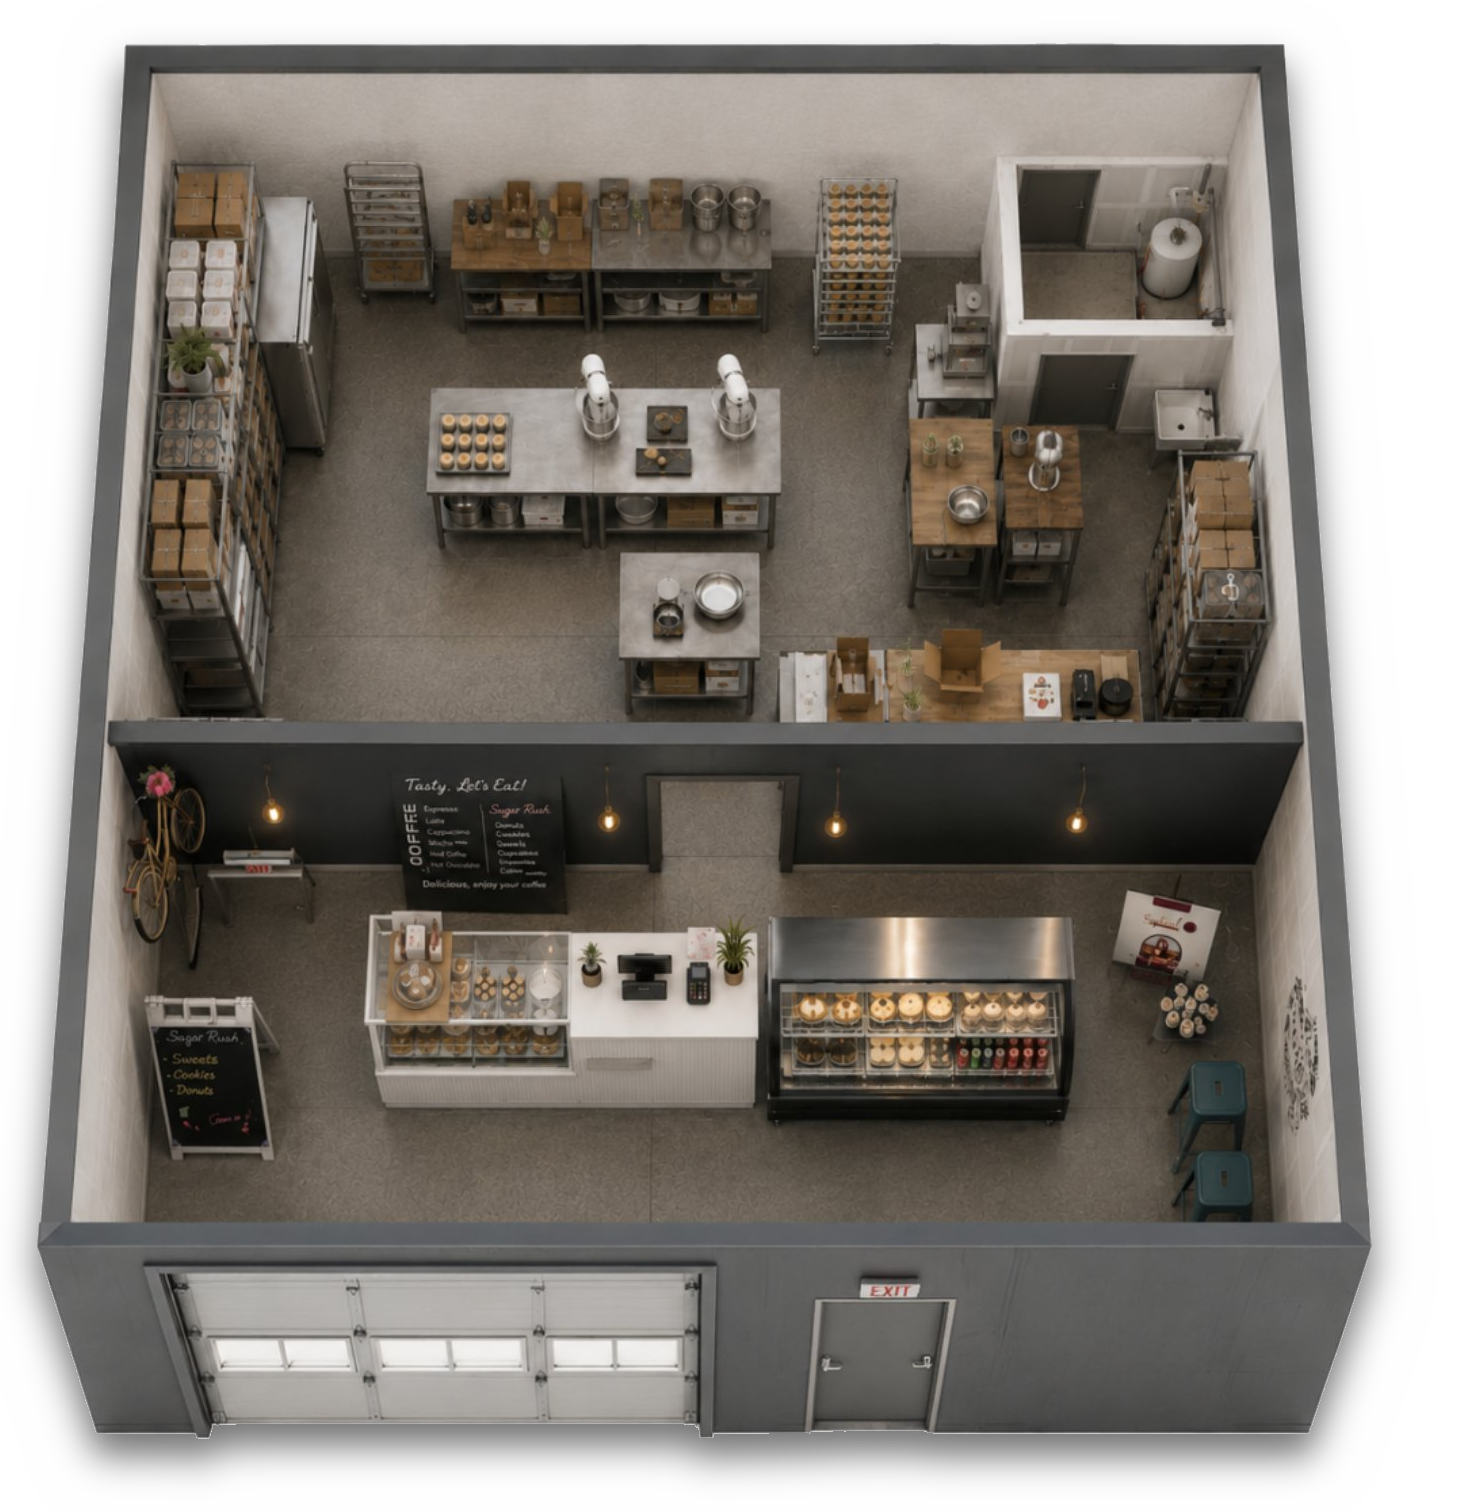
If customers or clients come to you
If customers, clients, vendors, or crew members visit the bay, the first few feet matter. Think pickup orders, fittings, consultations, tastings, walk in sales.
You do not need to make the whole unit look like a showroom. You need a clean entry zone that tells people they are in the right place. That might be a counter, a small table, a branded wall, a few product samples, or a clear pickup shelf.
The key is separation. Keep the working area behind a clear boundary. That boundary can be a shelf, counter, curtain, half wall, or simply a clean line where the front zone ends and the work zone begins. Lighting matters here too. Task lighting is for the bench. Customer facing lighting is for confidence. People should be able to see clearly what they are buying, picking up, approving, or discussing.
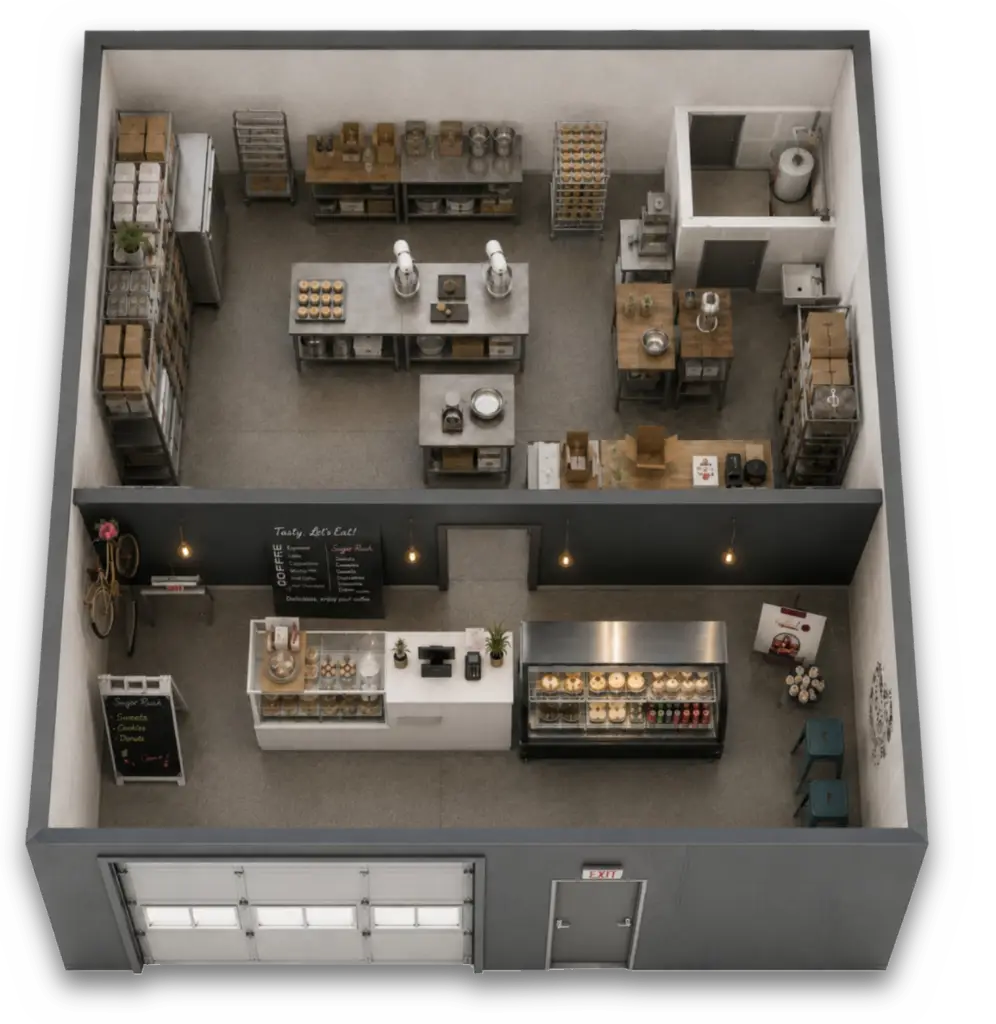
If your business needs both production and customer pickup, see how Sugar Rush split one space into a front for customers and a back for production in their story, From Home Kitchen to Professional Bakery.
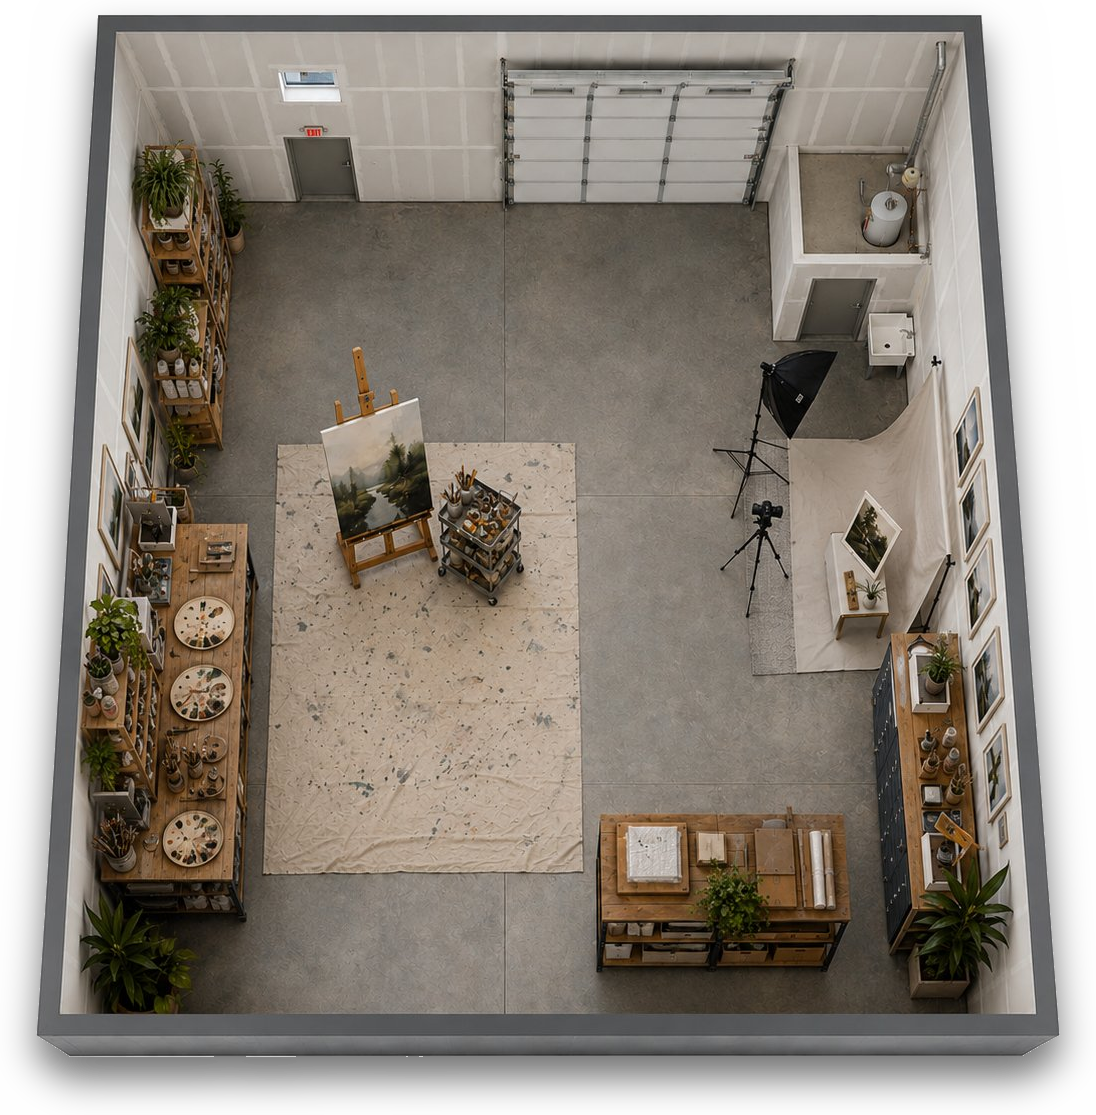
If you need a clean, controlled space
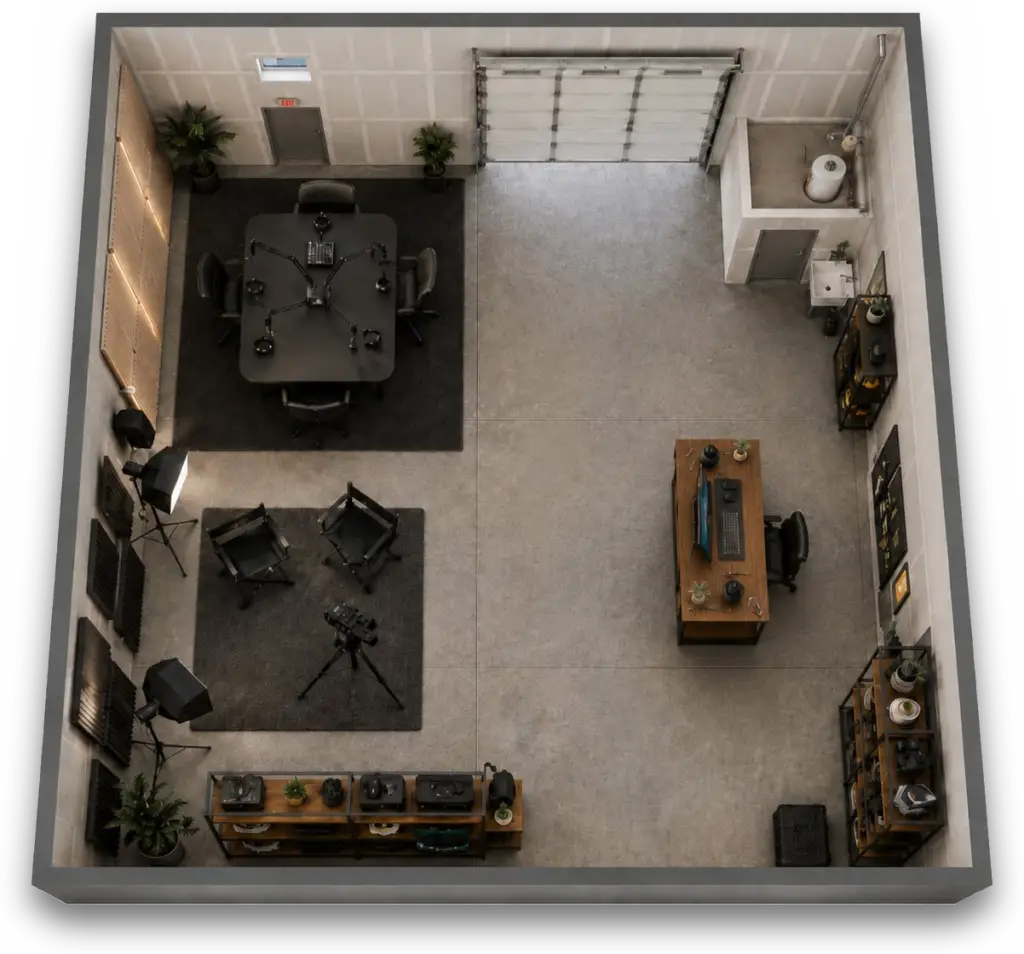
Some businesses need a bay that cleans up fast and photographs well. Artists, designers, content creators, and makers may need storage, packing, and a shoot ready corner all in one place.
Start by choosing the cleanest wall or corner.
Keep it free of extra boxes, cords, open bins, and half finished work. If you shoot products, stage inventory, host customers, or go live on camera, that corner should be ready without a full reset every time. Store props, backdrops, supplies, and extra inventory outside the frame. Use labeled bins or shelves so the creative area does not slowly become a storage pile.
For a real example, see how Austyn Marie Design turned a WorkBay warehouse into a showroom and fulfillment space with room for customer visits, selling, storage, and order work.
Five rules that make almost any setup work
Build around the door
Materials come in, finished work goes out, deliveries land. Block the door path and the whole bay slows down.
Label more than you think you need
Shelves, bins, orders, job materials, parts. A label is cheaper than losing ten minutes before a job.
Keep a staging area
Even a small one. Tomorrow’s job, today’s pickup, and half finished orders need somewhere to land besides the middle of the floor.
Put daily items close to the work
Touch it every day, it should not be buried. Touch it once a month, it does not need the best spot in the bay.
Leave room to change your mind
Start with the bench, shelving, door path, and lighting. Adjust once the bay has seen a few real workdays.
See what other WorkBay tenants built
The best ideas come from real tenants who made the space fit the business. None of these is the one right way to build a bay. Each one follows the work.
JKL Off Road
Outgrew a backyard shed and built room for mechanical work, machines, storage, and customers.
Read the story
Fife Antiques
A clean customer facing front paired with a working back, all in one bay.
Read the story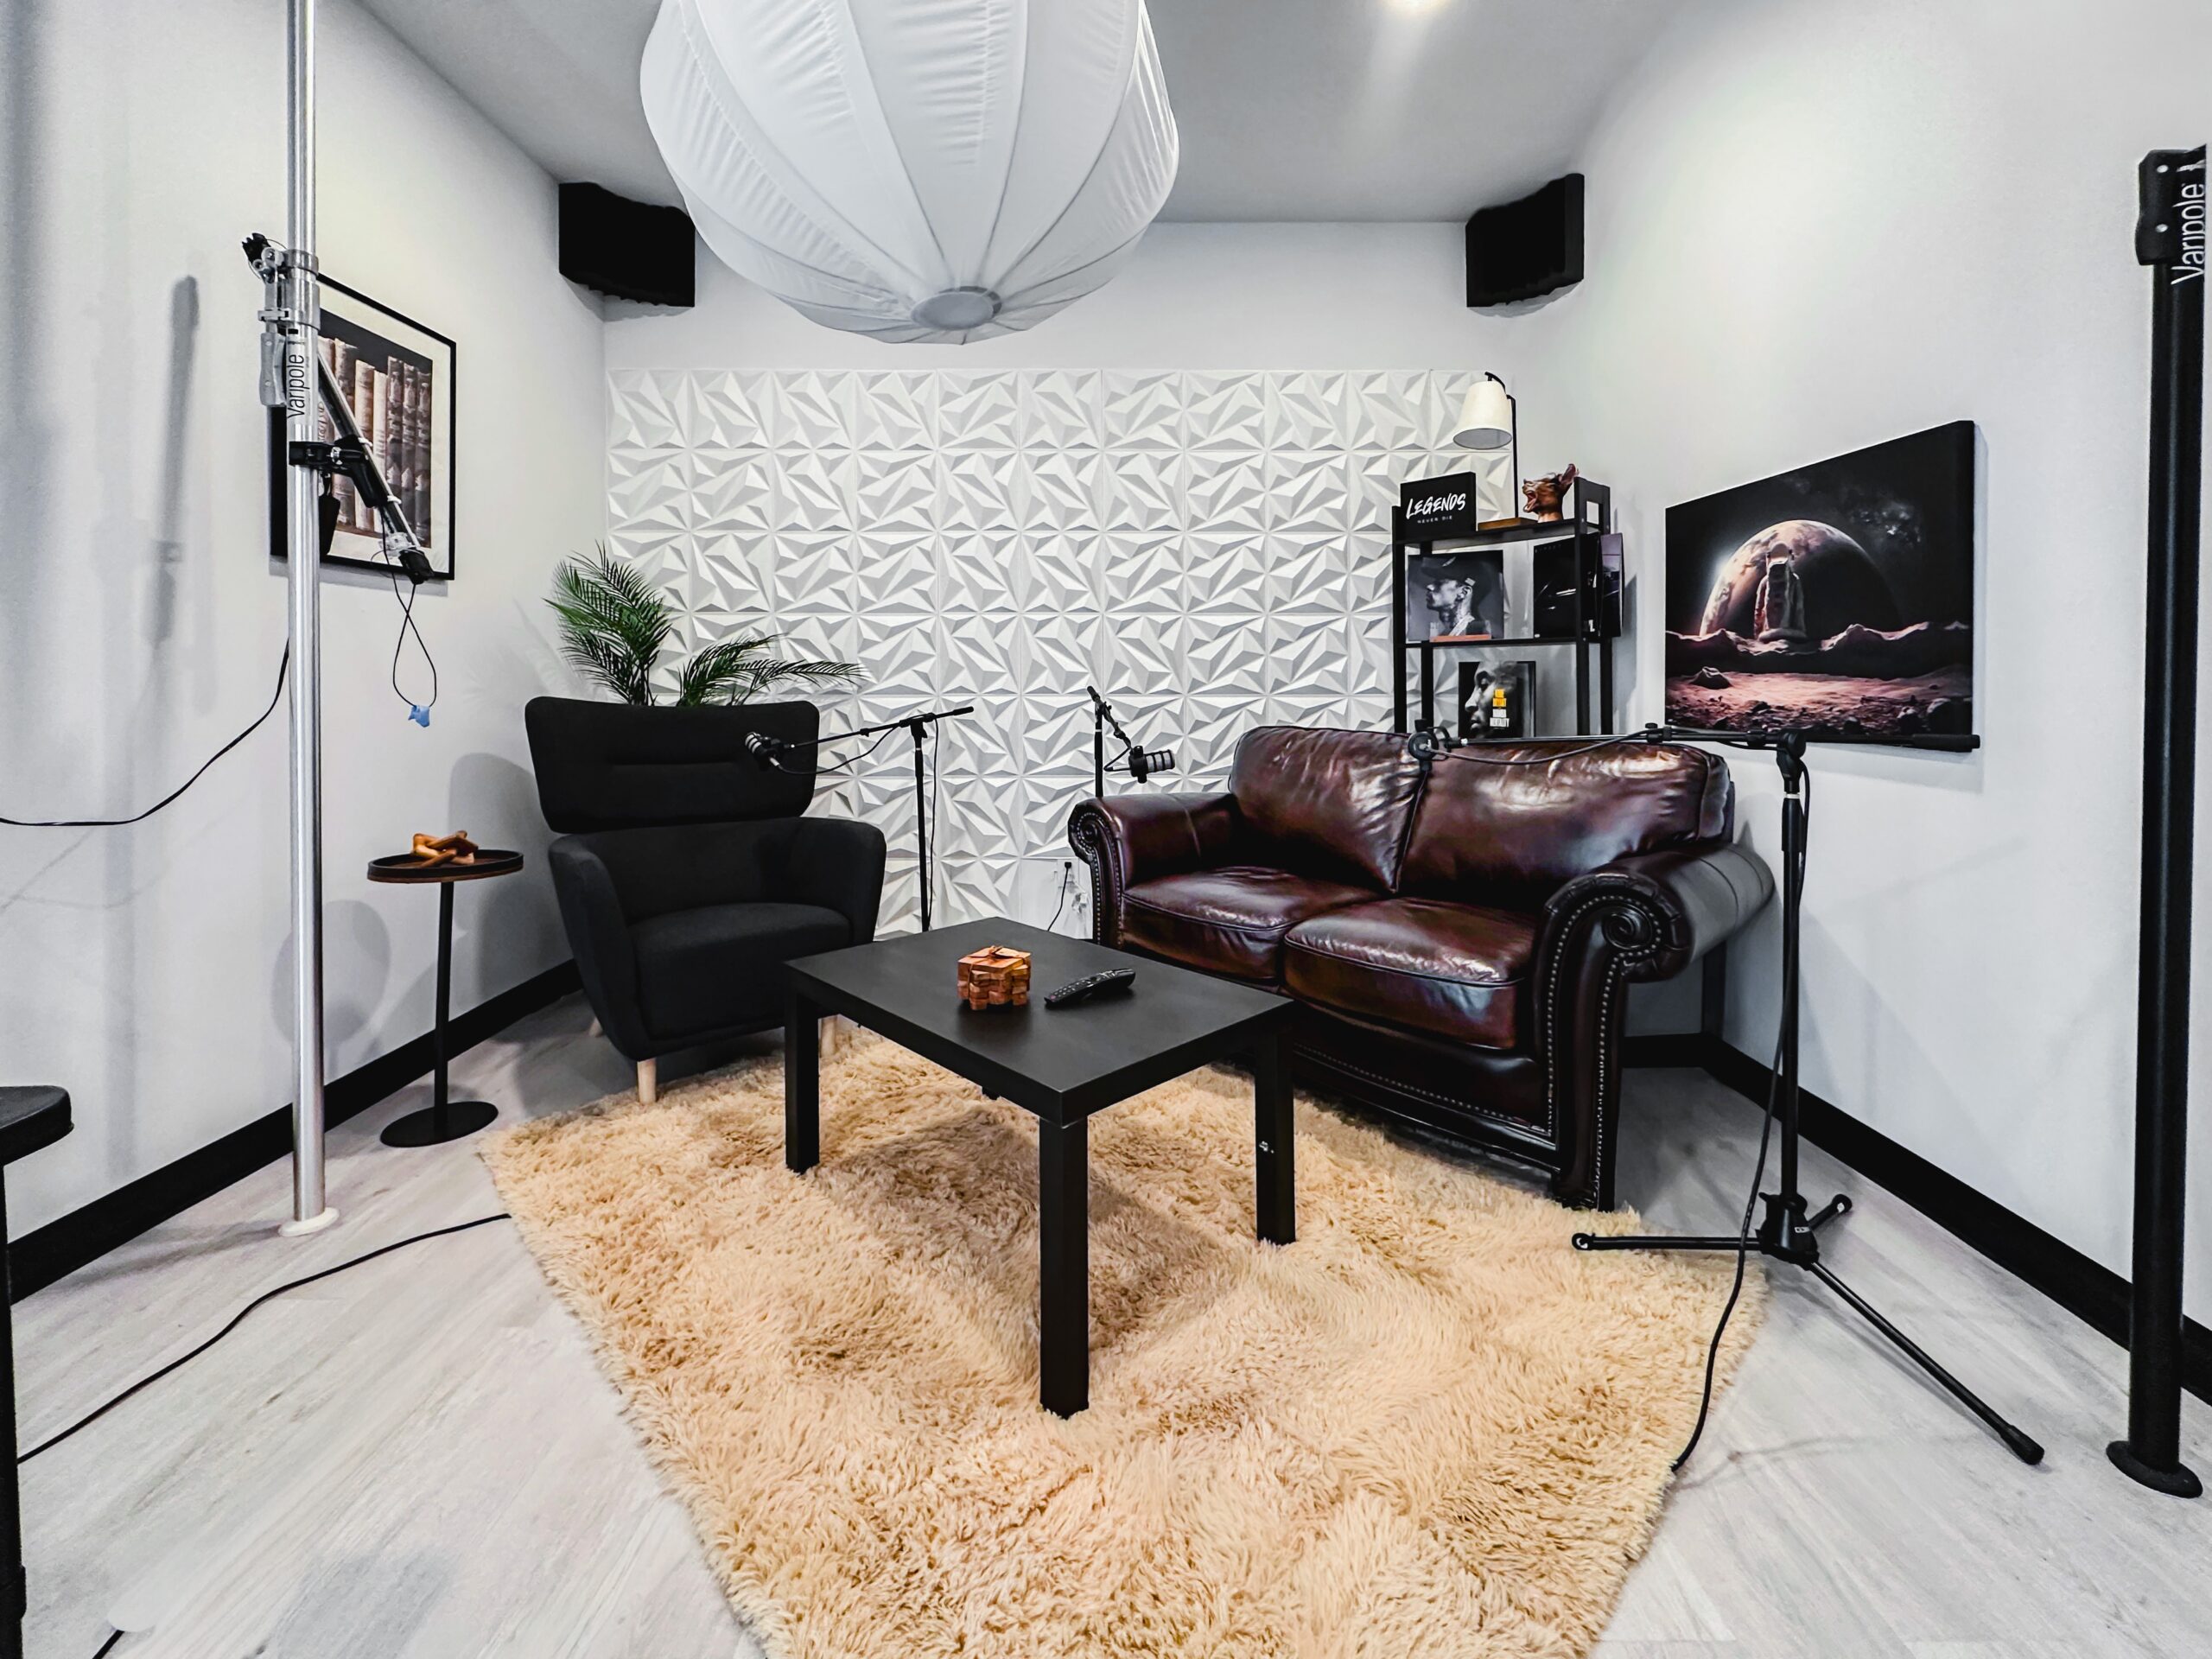
Popular Nobody
A shoot ready creative space with room to store, stage, and ship product.
Read the story